
by Tom Bartels
Spring Enrollment Starting Soon.
Add yourself to the email list to get notified!
Add yourself to the email list to get notified!
Add yourself to the email list to get notified!
When you’re trying to figure out WHEN to plant your seeds or seedlings, a good starting point is to know the official freeze dates for your area. Here’s how to find them.
 Growing seeds indoors is truly quick and easy once you get the hang of it. One thing you want to keep in mind first is timing. You don’t want to start seedlings too early and have to keep them indoors too long as the ground in your garden is still thawing out. So do a bit of calendar planning to find the freeze dates and general planting calendar in your area to back time your seedling planting dates. If you need help in this area, check out our free videos on the upper right side of this webpage.
You can make your own or purchase ready-made seedling mix. The medium you will grow your seedlings in should have the following attributes for successful propagation of seedlings.
-Good Drainage
-Non-crusting surface, so the small seedlings can push up through the surface.
-Neutral pH (7.0) this refers to the alkalinity of the soil.
-50% air space in the soil medium
-Low salt levels (no fertilizer)
Luckily you can usually go out and buy a bag of good sterile seedling mix and a few seedling trays to get you started. But you want to make sure it has good drainage.
Good drainage: Seeds need moisture in the soil but not standing water. They actually do better in soil that is 50% air space, well drained but with 100% humidity. That humid space between soil particles that is drained of static water is perfect for root growth. The mixture you use to start seedlings is different than soil or potting mix. The seedling mix is a lighter medium that helps give seeds their best chance of getting through the tricky period between seed and seedling. Some of the diseases that hit seedlings are brought on by
Too much standing water, and heat
Not enough air circulation
Both can lead to damping off or other maladies that will create poor germination and growth.
Most of that can be avoided by making sure not to overwater and by keeping enough air circulation around the young plants. Some people use a small fan.
Available products for seedling mix:
Peat-based products:
You may have heard that Peat is a good product for starting seeds. It is becoming less so. Peat is a limited resource that takes a large amount of fossil fuels to produce and ship from Canada and is becoming a lesser tool in organic gardening, although it is still commonly used because of its beneficial attributes for young plants. Make your own choice here.
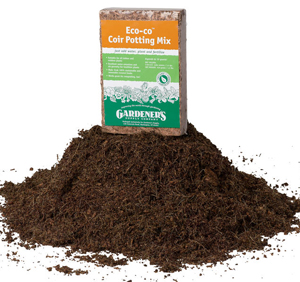
Coir fiber
Coir-based products: (pronounced “core”)
Coir is a renewable product that comes from coconut fiber, is a neutral pH and has properties much like peat without the environmental footprint.
Coir comes in brick form and can be put in a wheelbarrow and soaked in water for about 15 minutes, which makes it expand to its usable state, which is about five to seven times in volume.
You can use 50% coir (or peat moss) and 50% perlite for a sterile seedling mix base.
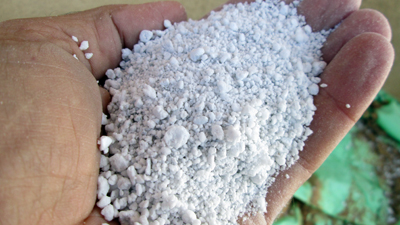
Perlite granules
Perlite: Aside from having a light and absorptive medium to start with, drainage is key. That is why most seedling soil mixes have a product called Perlite added to it. The pearlite is a mined product that looks like miniature popcorn. You can buy it in bags at most garden centers and is an organic product. If you make your own seedling mix, you should make it about 50% pearlite. (Pearlite is ideal for use in seedling mixes but not so good for in the garden beds since it tends to migrate to the surface and blow away eventually.)
Vermiculite:
Vermiculite tends to absorb too much water to be useful in a seedling mix. It also has the tendency to hold onto and lockup potassium over time.
I then add an equal part sifted (plant based) compost to the mix to provide slow release micro nutrients and nitrogen for the plants. You don’t want any manure in the compost since the high salts will risk burning the roots on your seedlings. Some people go with a sterile mix here because of the risk of pathogens from the compost hindering the seedling growth, but if you use plant-based compost and there is enough air circulation and the plants are not overwatered, most of the risk is avoided. If you take the sterile route you will need some organic liquid fertilizer once the second set of true leaves have appeared.
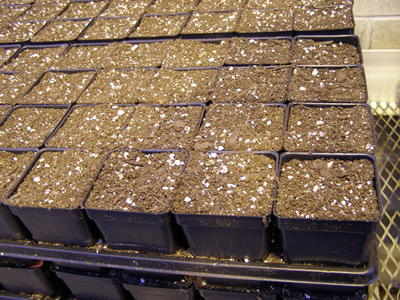
Once you have your seedling soil mix you will need some sort of trays to start them in. Many people use the standard black plastic seedling trays with 50 or 72 cells in them because they are so readily available and work pretty darn well. They have round cells or square and you can buy them new for a nominal price or you can re-use old ones that you can sometimes get free from nurseries.
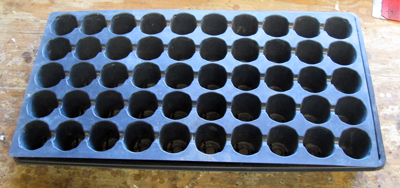
50-cell tray
*Note that anytime you use trays that are recycled you will want to first make sure to soak the cleaned trays in a 5% bleach solution to kill any remaining pathogens that are waiting there to harm your precious seedlings. Once this is done, and they are rinsed well, any trays are perfectly fine to use over and over. It’s the best way to keep them out of the landfills. Pre-wet your seedling mix with water so it is like a wet sponge but not dripping. Then fill the trays with the mix all the way to the top of the trays.
There are other types of containers that people use to start seedlings. Everything from tubed newspaper cups, peat containers, egg cartons and even eggshells themselves. Some of the biodegradable containers like peat pots are nice for plants that don’t like to be handled for transplanting like cucumbers and squash. Seedlings in these types of containers can be planted directly in their fiber pots when ready.
Germination rate.
Each packet of quality seeds will have a germination rate on the package. If it is 90% this means that 90% of the seeds you plant will germinate if planted correctly. You will use this to estimate how many seeds to start based on your allotted growing space in the final garden bed. If the seeds of a particular variety have a lower germination rate, like 50% you will want to plant twice as many as you expect to have in the final run since only 50% will germinate. But if the rate is high in the 90+% you can trust that you will have close to the number you plant come to full germination. Only buy the amount of seed you plan to use during a two to three year period at the most. The fresher the seed, the better the germination rate.
Fill trays to the top.
Seed depth
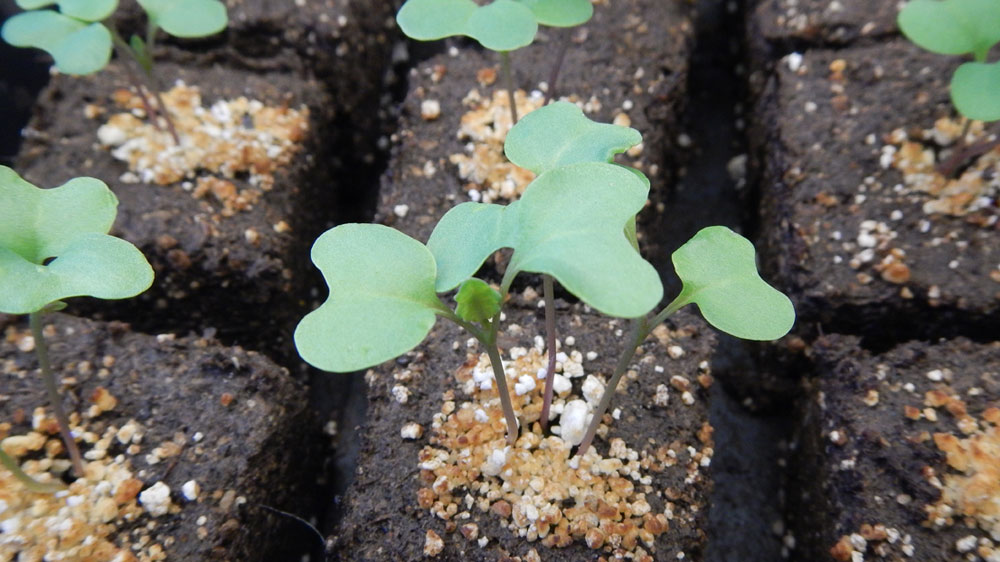
Once you fill the trays with your seedling mix, the magic begins. Each seed type has a different depth requirement and it is good to look at the seed packet suggestions to find out what they are. Certain seeds like to germinate right on the surface, like and others, just below the surface.
Seed spacing.
If your seeds have a good germination rate, there is no need to put more than two or three of them per cell. Otherwise you will create more work in the thinning out process later on if multiple seedlings are crowded into a single cell. This can restrict airflow and create conditions for damping off or other damage from pathogens. Give your young seedlings plenty of breathing room in each cell once they come up. You can cut off the stems of competing seedlings inside a cell with scissors to thin them out. That way you don’t have to disturb any delicate root growth. You want to do this before the second real leaves reveal themselves.
Soil Temperature:
The optimal soil temperature for germination of most warm season crops is around 70 degrees at 100% humidity. Cool season crops can germinate best at around 50 degrees. So for germinating and growing seedlings, it is best to seek out a place with consistent warmth if possible. Electric tray heaters are commercially available if you want to go that route. They are thin pads that are placed under the trays and are thermostatically controlled to keep consistent warmth. If you are using a windowsill, make sure its not one that gets too cold at night. Close any insulating shades or drapes to keep the soil from getting too cold at night. Avoid using windowsills that get too hot during midday.
Humidity
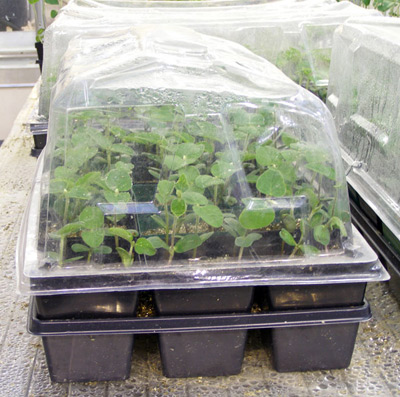
domes
100% is the ultimate goal but no standing water in the trays. This can be accomplished by spraying the mixture with water and putting a clear plastic dome cover on the tray or covering it with a sheet of plastic wrap until the seeds germinate. As long as the plastic has a pretty good cover on the tray and it traps the moisture, you shouldn’t have to water it again until the seedlings come up. Check each day to make sure it is still moist. Re-apply water spray when necessary.
SPEED:
Once you sow seeds you want them to germinate as fast as possible (which is why heated germination trays and lights help) If they don’t germinate, they can sit too long in soil both in trays or in direct seed situations in the garden, and are more susceptible to pathogens or rotting. When the seedlings start growing above the soil in the trays, remove any flat plastic. Domes can stay on as long as they don’t interfere with growing seedlings. If you are using a windowsill, make sure to turn the trays each day so the plants don’t lean to sun.
Light:
If you are using a light source, you want to bring it down as close the plant surface as possible and raise it as the seedlings grow. This is to avoid the seedlings from getting too leggy by reaching for the light. This is also a risk that is created when you plant seedlings too early and can’t transplant them outside for long periods of time. The seedling will spend too much time in the trays and get leggy and weak. So there is little advantage to planting seedlings earlier than necessary for your climatic zone.
“Damping off” can be combated by increasing air flow (putting a small fan on low near the seedling tray) and watering in the morning so the soil has time to dry off before nightfall. Most pathogens work at night and if the soil is wet, you are helping them do their dirty work. Also when watering seedling trays, don’t flood them since this can help spread any disease caused by pathogens in the soil.
“Hardening off”
As the seeds outgrow their cells, they can be transplanted into larger pots depending on the needs of each vegetable. Before they are moved into the garden and transplanted they need a period of “hardening off” where they get used to different temperature swings and direct sunlight outdoors. Start by putting them in the shade during the warmth of the day for a few hours. Increase the exposure time to sunlight each day as long as they don’t show signs of stress. If they wilt from their first few times of sun exposure, they usually recover if watered and brought back inside for the night. This process can take up to two weeks depending on the plants. If threat of frost has passed by then, the plants should be ready to be planted into the garden.
TIP: Don’t feed seedlings in trays any fertilizer until after second set of real leaves grow. The roots can burn easily. Seedlings get most of their nutrients from the seed during the germination process.
I wanted to give you a heads-up on why you should garden, and why you should also read through all the details with a certain detachment at first. There will seem to be way too much information in the beginning. All the charts, soil details, and time sensitive steps involved in planting a vegetable garden may make you feel like it is all just too confusing and make you want to give up before you start.
Relax. Most of this confusing stuff only happens in the beginning. Sure, there are some general principles that good food gardeners tend to follow, but Continue Reading →
First time gardeners face a list of choices that can be somewhat daunting at first. Where to begin? What do I plant? What tools do I need? (and on and on…) But if taken a step at a time and prioritized correctly, the process can be streamlined quite a bit.
I’d like to give a few pointers here on some general priorities for people who are looking for direction.
Location is one of the first concerns. Make sure it is a sunny space that receives at least six hours of sunlight per day, or more, without any major obstructions. The placement should be as close as possible to your house or kitchen to make it more likely to use the space for growing and make it easier to move produce from the garden to the house. But don’t locate it close to the house at the cost of sun exposure. Think about how close it is to your water source as well. The closer to a main water spigot, the less walking and hose lengths for you over the season.
Drainage is something to look at as you decide the site location. Gardening is harder on a hillside or on undulating ground, although it can work. You should preferably choose a flat site with good drainage around it, where it won’t get too waterlogged or too dry.